
How to Create Your Own Digital Language Journal in Keynote
Please keep in mind that some of the links in this post are affiliate links. In the event of a sale, I will be awarded a small commission (at no extra cost for you).
In a previous article, I shared the many benefits of keeping a language learning notebook and showed some pages from my own digital language journal.
A lot of readers have contacted me to ask how I created my digital journal. So, here it is: a step-by-step guide on how to create your own digital language journal using Keynote.
Please note that the instructions are for Keynote, but you can use MS PowerPoint or Google Slides to achieve something similar.
What you’ll need:
- A tablet and a stylus. (I use the iPad 7th generation and the Apple pencil first generation).
- Keynote (you can use a presentation application such as PowerPoint or Google Slides, but the below instructions are specifically for Keynote).
- A note-taking app such as Notability or GoodNotes.
- Optional: For design elements like patterns, binder rings and so on, I like to shop around on Creative Market.
Step 1: Sketch out your layout
Before starting, it’s a good idea to plan out what you want included in your journal.
Grab a pen and a piece of paper and roughly sketch out your spreads and layout. This will help save time during the design process.
Questions to ask:
- Do you want a landscape or portrait layout?
- What colour scheme do you want to use?
- Which pages do you want to include in your journal? For ideas on what to include, check out this article. This will help you to come up with rough designs and layouts for your various pages.
Step 2: Creating the template page of your journal
Once you have a rough idea of the layout and pages you want to include in your journal, it’s time to start creating your digital journal pages.
Note: You can also set this up as a master slide. It makes it easy to add pages with a consistent basic design and layout. However, I have found that the document will struggle to load in your note-taking app if your master slide contains a lot of large graphics.
- Open Keynote and start with a white presentation.
- First, you are going to select the best size and orientation for your journal. To change your slide size, select the document button in the top right-hand corner. Then select custom slide size in the slide size dropdown. Type in your preferred size in the pop-up box and hit ok. I prefer to use portrait orientation and find that 650×842 works well with my iPad screen.
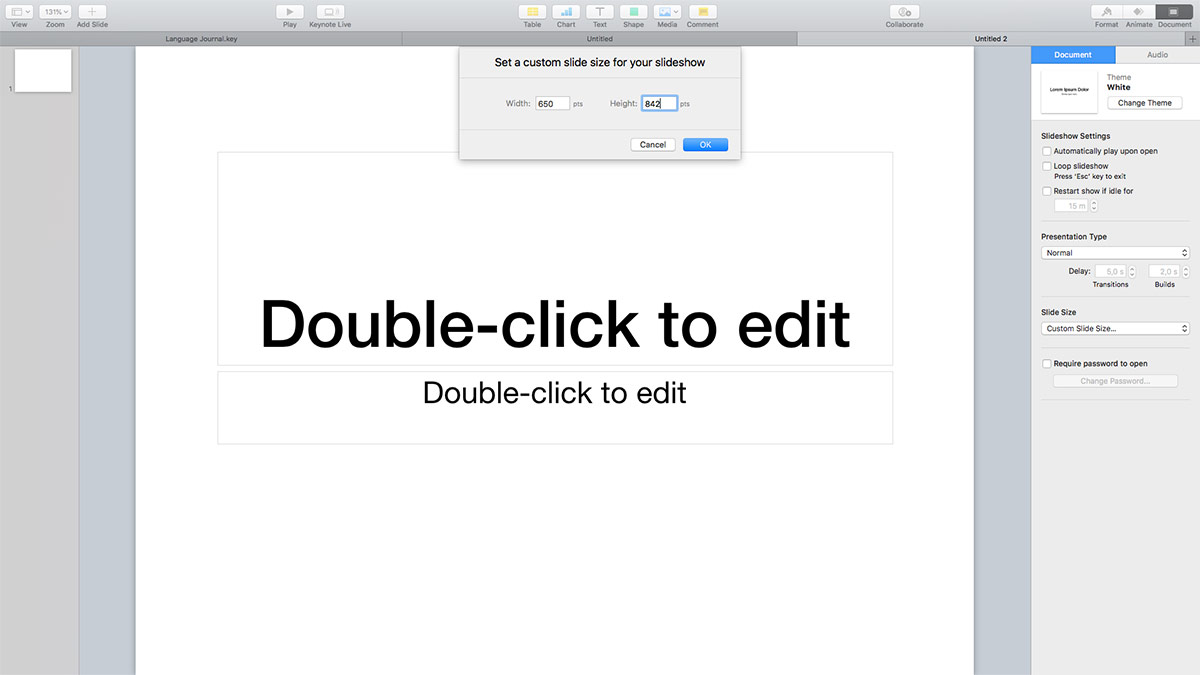
- Now that you have the right slide size, go ahead and delete the default text on the slide.
- Next, we are going to choose a background colour for your journal. Let’s go with a neutral grey for now. You can always change it later. To do this, select the format button in the top right of the toolbar. Under background, select colour fill and choose your preferred background colour.
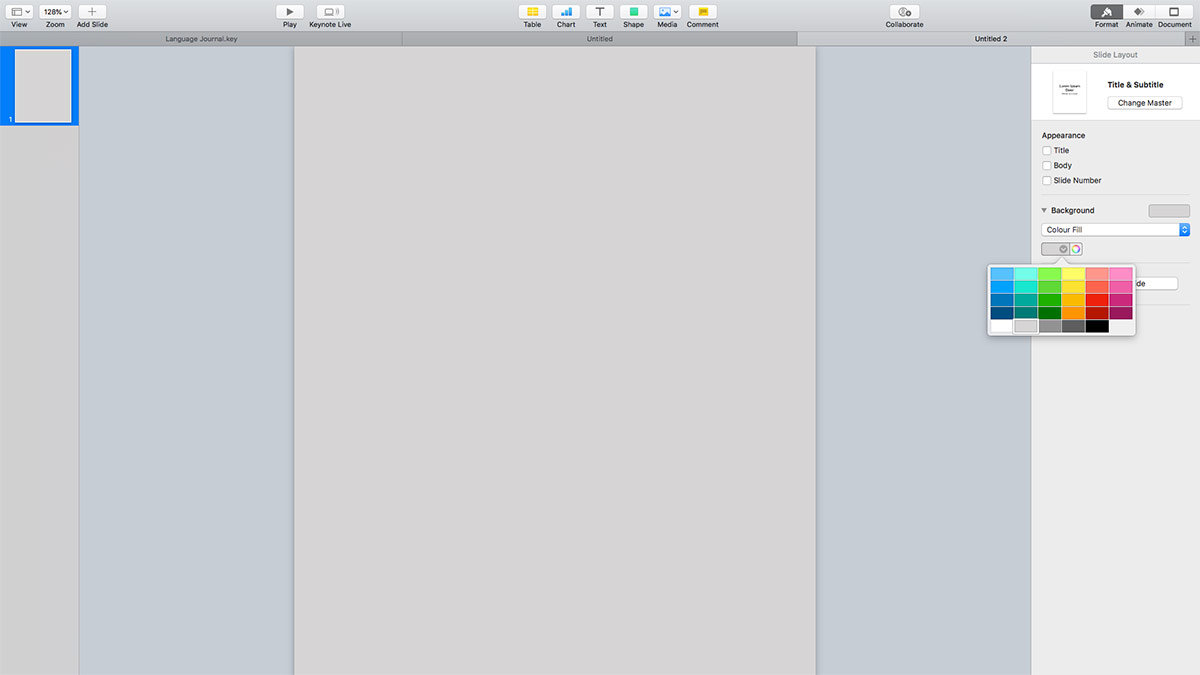
- You now have a nice background colour. Let’s create the pages of your journal. Click on the shape button at the top and select the rounded rectangle option.
- This adds the rectangle shape to your slide. Resize it as you want. I like to leave some space at the top and the right hand side for adding tabs. You can sharpen the edges of your rounded rectangle by dragging out from the green node on the shape. This will make in look more like an actual page.
- Now we’re going to change the colour of your page. I prefer white, but it’s really up to you. Let’s go ahead and select the shape by clicking on it. Set your preferred colour by following this path: format>style>fill>colour fill>select white.
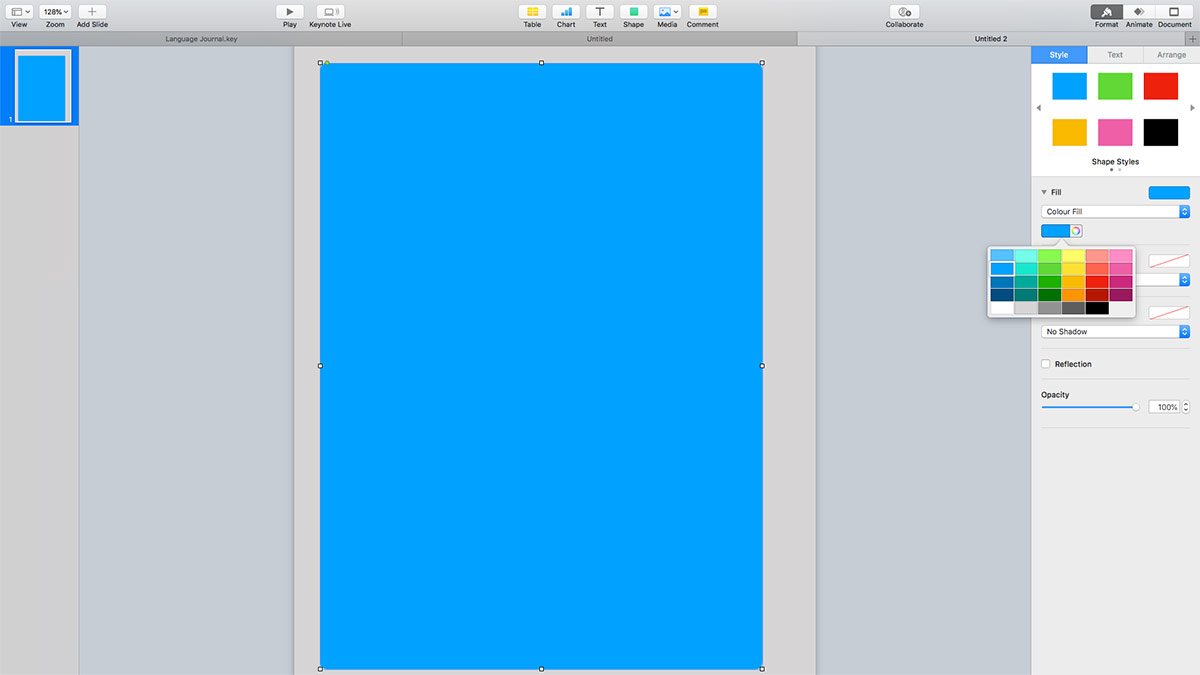
- If you want to add some depth to your page, play around with drop shadows until you have something that looks good to you. Some people also like to layer shapes so it looks like pages of a book. It is up to you!
- Now you have your white page. If you are happy with its position, you can lock the shape under the arrange tab. This will prevent you from accidentally moving it around when working on your document.
- I bought some really nice binder ring graphics from Creative Market, so I added this by using the media tab to insert the graphic and then resizing it so my journal looks like a ring binded book. You can lock this element too.
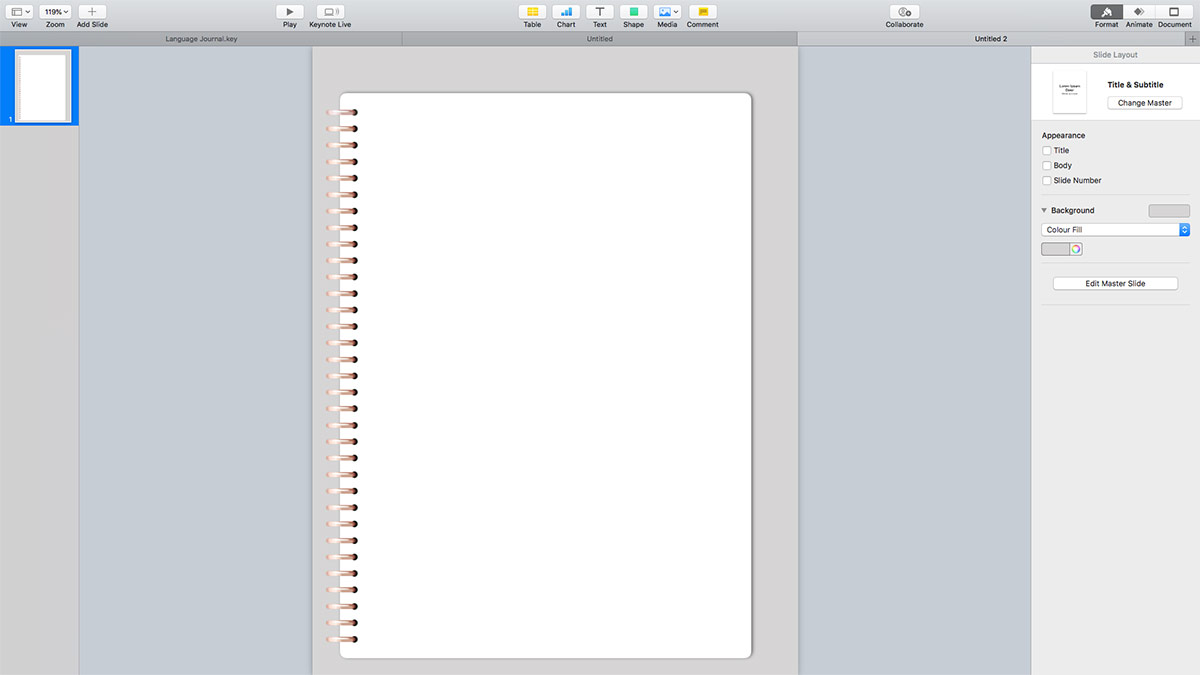
- Next we’re going to add some tabs to your journal. Begin by adding a rounded rectangle and resizing it until you have the desired shape and size.
- Copy this shape a few times and position the rectangles evenly along the length of the page. You can decide how many tabs you would like.
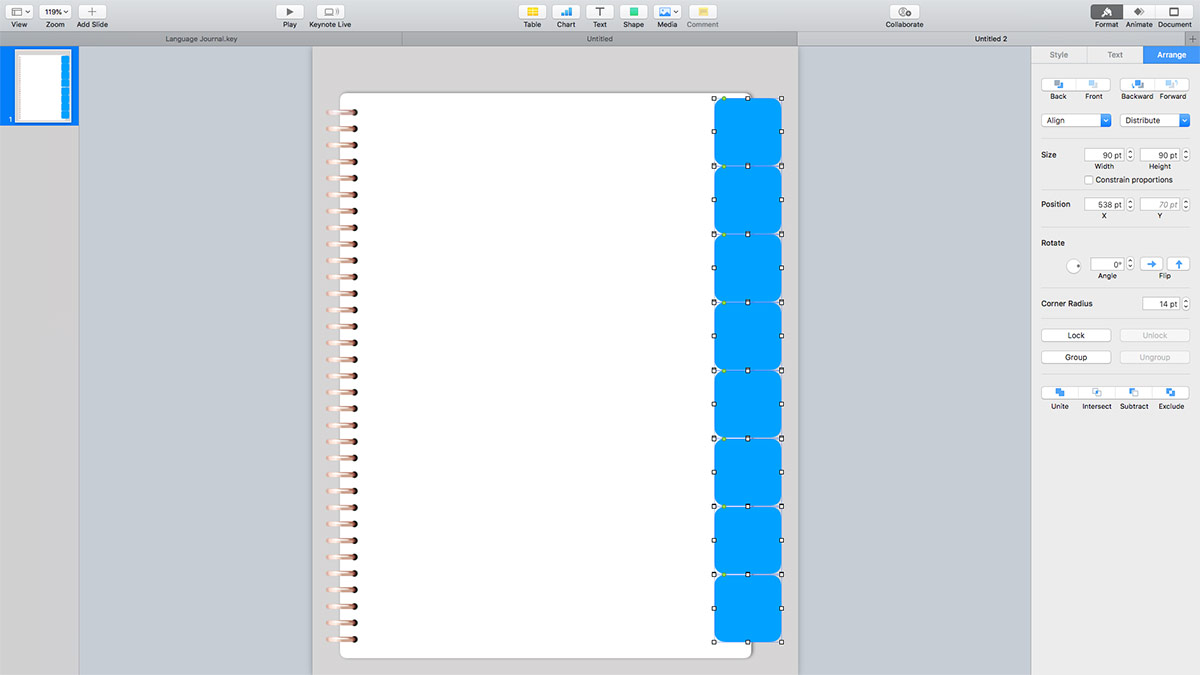
- Select all the tabs and change the colour under the style tab (format>style > fill>colour fill>select your colour). You can also experiment with tab drop shadows under the style tab.
- With all of the tabs selected, group them together by hitting the group button under the arrange tab. Now you can easily resize the grouped tabs to fit to your page.
- Once you have resized your grouped tabs to fit evenly along the length of the page, send the tabs to the back by selecting the grouped tabs and hitting the back button under arrange.
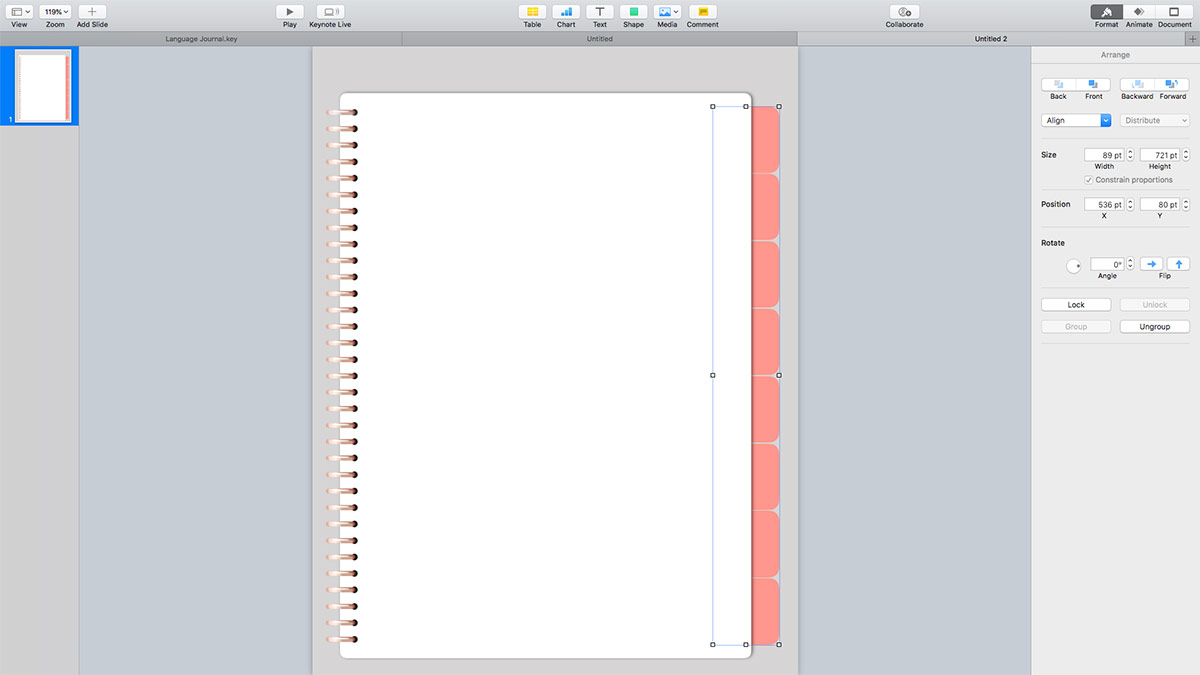
- You can add tabs along the top of the page as well if you need them.
- Now you can label your tabs by adding vertical text to the individual tabs. Simply add text using the text button in the top toolbar and then hit the vertical text tick box under the text tab. You can label your tabs as you wish and also change the font to something that suits the overall style of your journal.
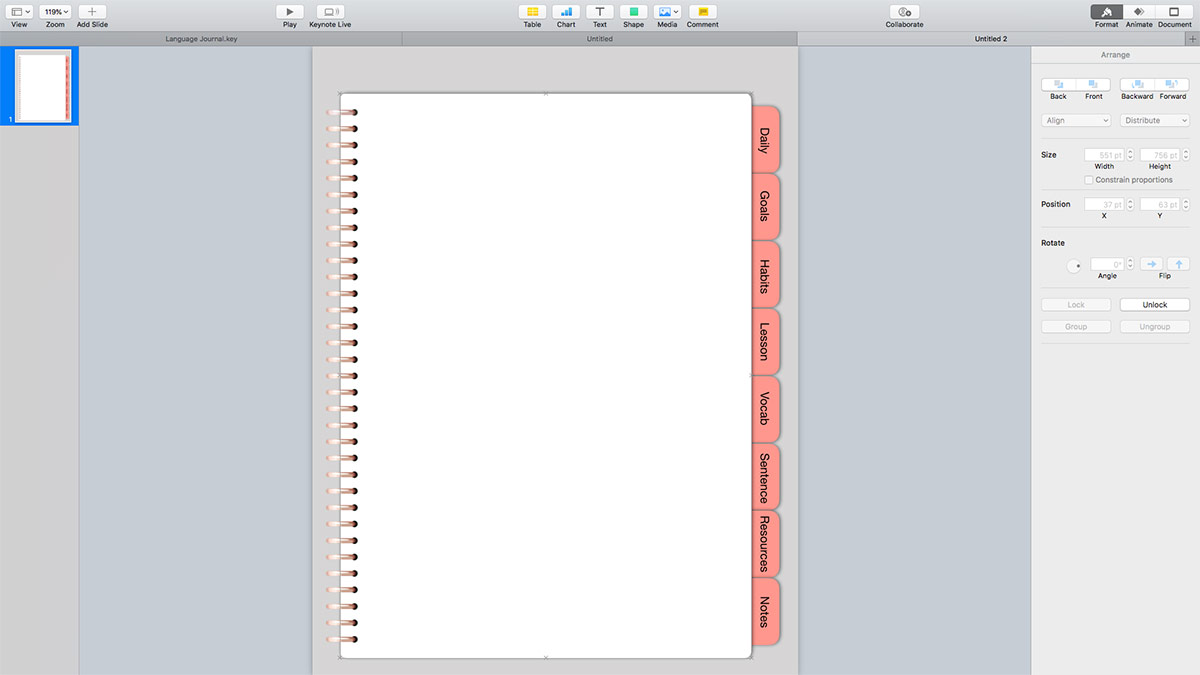
- Once you have labeled your tabs, you’re pretty much done with the design that will form the template for your journal pages.
Now we’re going to create the front page of your journal.
Step 3: Creating the front page
- Copy and paste the page slide you created in step 2. This will ensure that you maintain a consistent layout and size throughout your journal.
- Working on your newly copied slide, unlock your white page element so you can work with it (press unlock under the arrange tab).
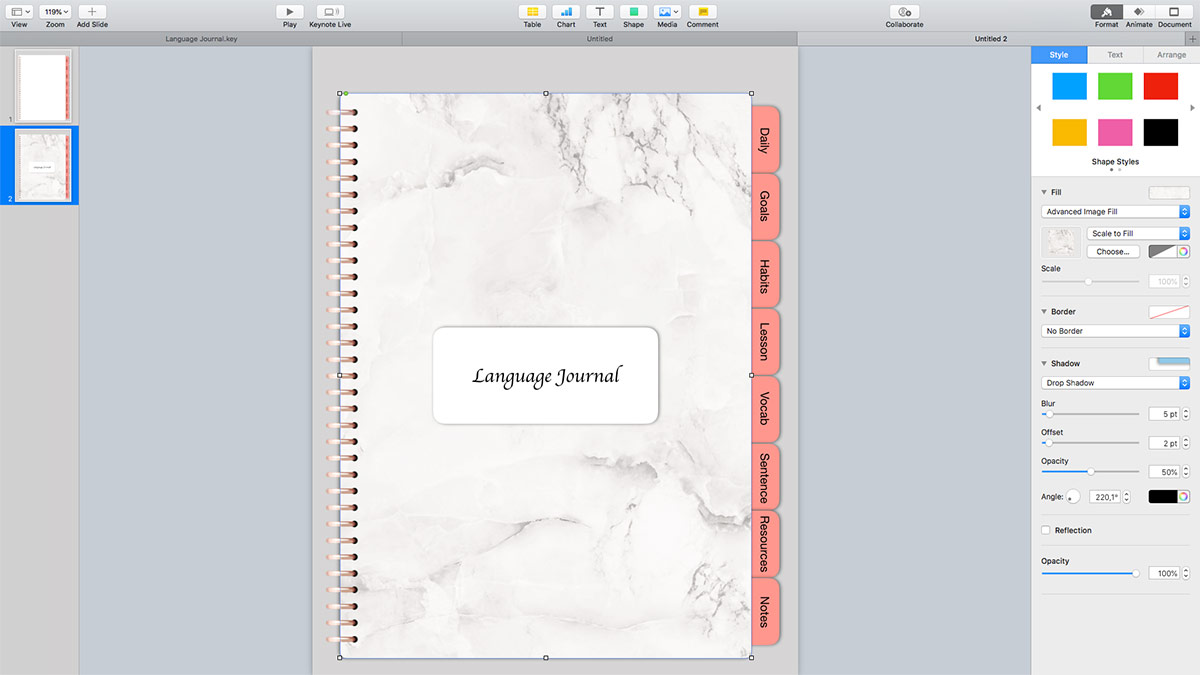
- You now want to create a front page design. Select the page element (the white rounded rectangle), then select style > fill > advanced image fill. Hit choose to import a pattern of your choice from your saved files.
- Next, you want to add a label to your front page. Select another rounded rectangle and resize it as you want. Make sure it is centred on your front page.
- Select the colour you want for your label and add some drop shadows to make it look more like a label sticker.
- Finally, add a text block to your label and title your journal whatever you want. You can play around with the style and font.
- Move your title slide so it is slide #1.
Step 4: Design your pages
Now that you have your front page and page template, you can create as many journal pages as you want. Copy and paste your page template slide to keep the layout consistent and then make changes to the copied slide.
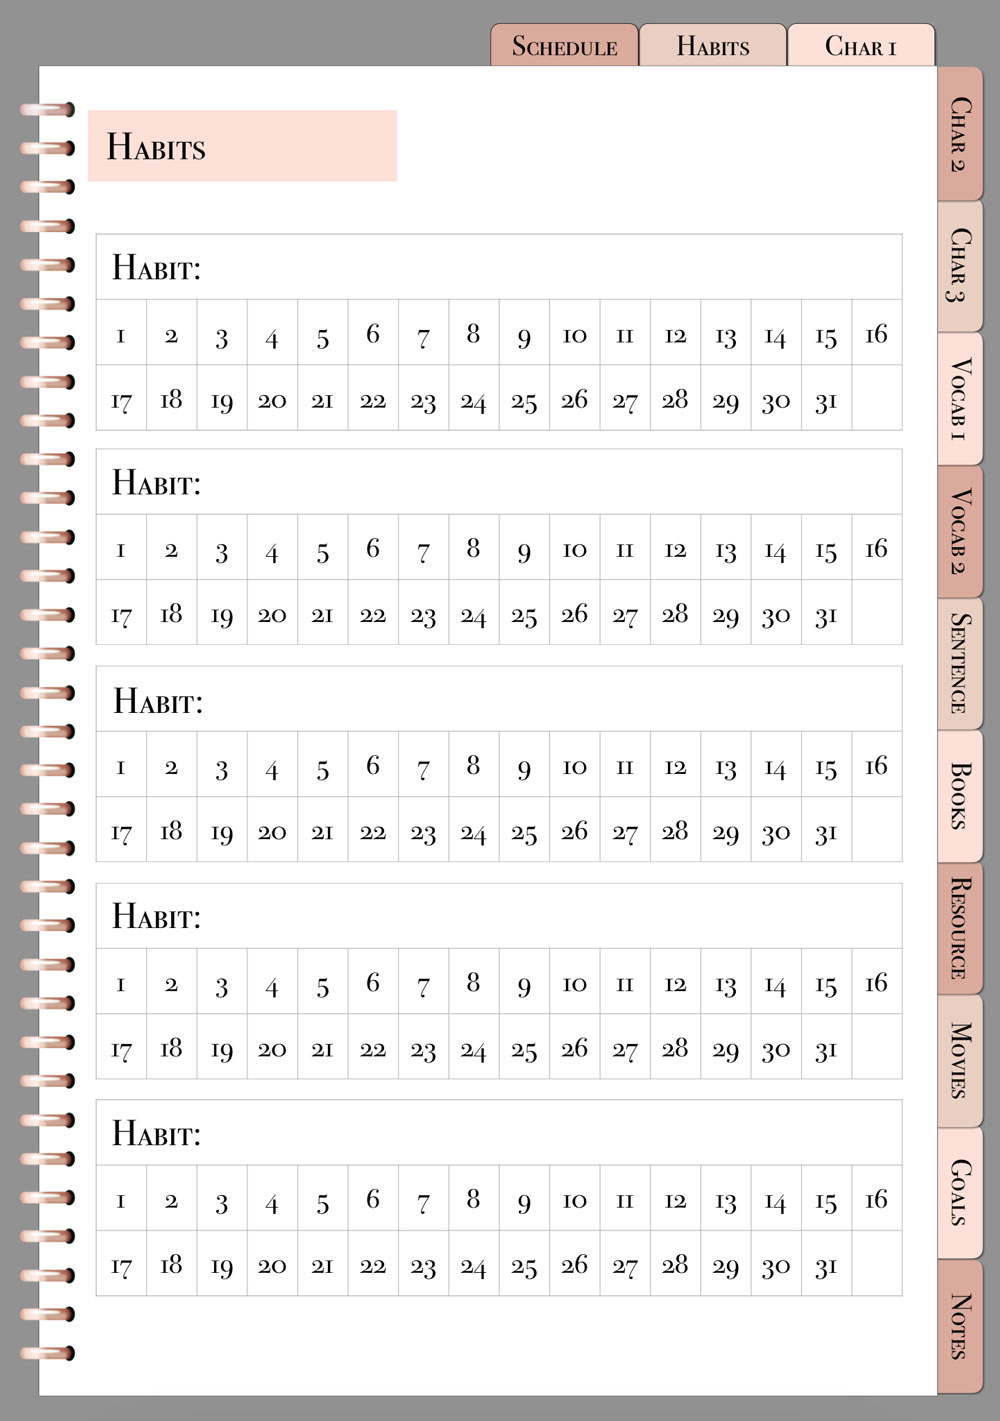
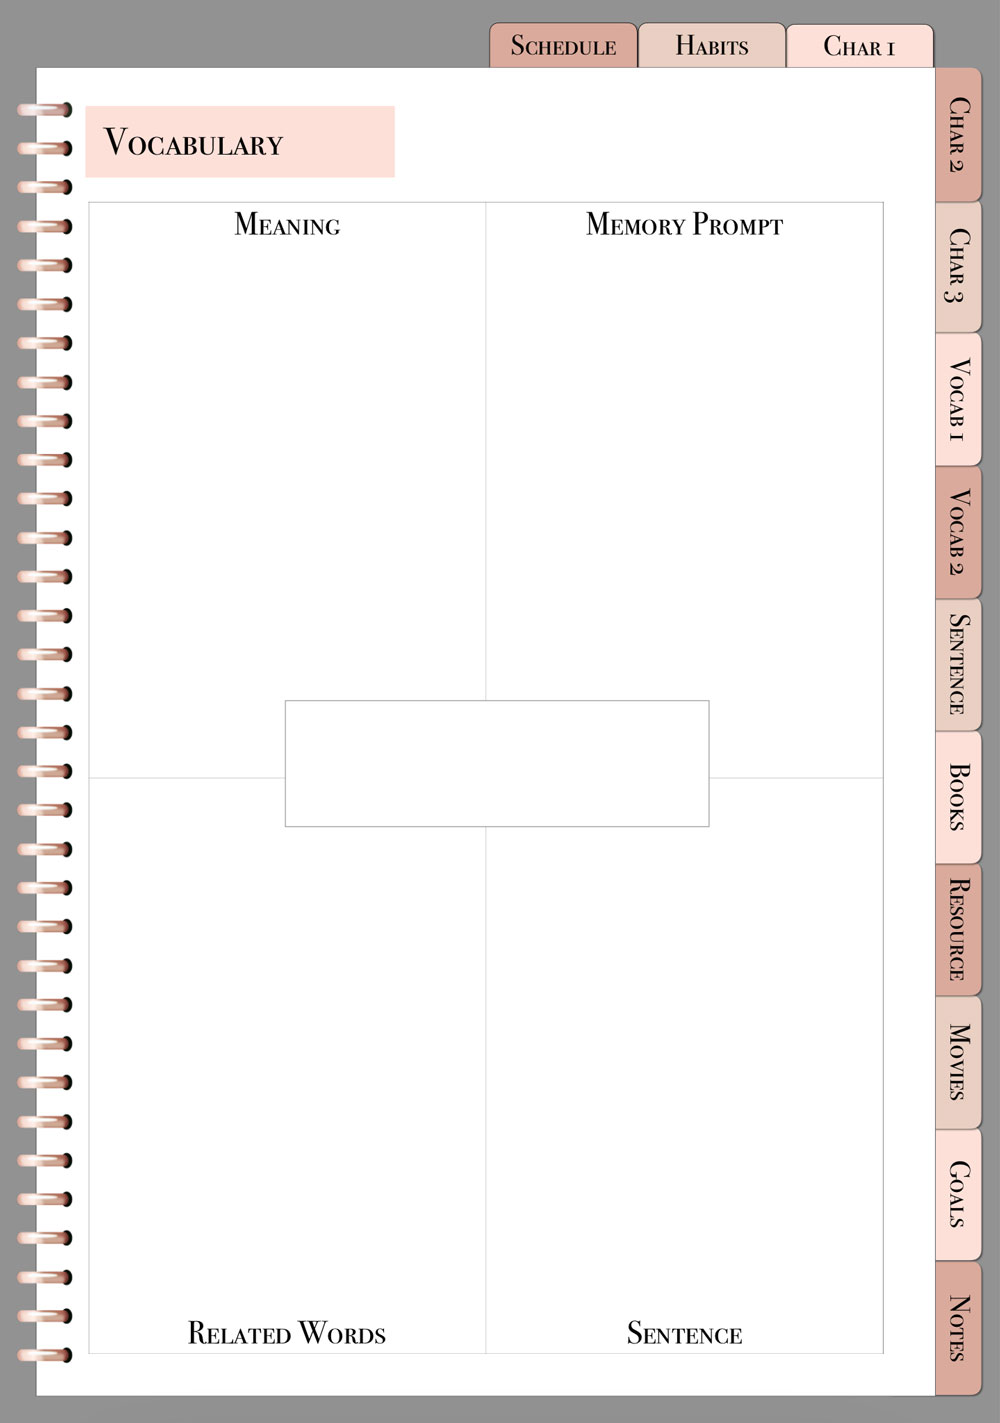
The exact layout of your pages will depend on your needs. Play around with various elements, blocks, and tables available in Keynote. Here are a few examples from my journal for inspiration.
Step 5: Adding hyperlinks
The great thing about using a presentation application like Keynote to create your digital journal is that you can add hyperlinked tabs. This will allow you to jump to a specific page when clicking on a tab.
Here’s how to add a hyperlink:
- Ungroup your tabs first.
- Select your tab> right-click > select add link > slide >choose the slide you want to link to from the slide dropdown at the bottom of the list.
- Repeat this process for all the tabs you want to hyperlink throughout the document.
- Linked tabs are indicated by a blue arrow.
Step 6: Save as PDF
When you are finished with the design of your digital journal, save it as a PDF.
In the Keynote toolbar, select file > export to > PDF. Make sure you select image quality ‘best’ and select where you want to save your PDF to. Hit export.
Step 7: Import it to your note-taking app
This step will vary depending on which note-taking app you are using. You’ll need to ensure your PDF is saved on your tablet or the cloud.
I use Notability, and you can import a PDF from the Notability app by following these steps:
- Open the Notability app
- Select import in the top-right corner (an icon that looks like a block with an arrow pointing down)
- You can now choose the location where you saved your file, e.g Dropbox or Google Drive.
- Click on your saved PDF file.
- Choose create new note and then import.
- Your file will open in Notability.
There you have it: an easy way to create your own digital language journal using Keynote. Keen to try your hand at creating your own digital notebook? I’d love to see your designs!



1 Comments
Lola
April 6, 2021 at 12:48 pm
I’d never thought about doing online journalling this way before: thanks for sharing it! Yours looks stunning 🙂
Comments are closed